HUB 03 · Sous Vide
Do You Sear Before or After Sous Vide?
It's the first question every sous vide cook asks, and the answer is refreshingly clear: sear after, almost every time. Here's why the post-bath sear is what gives you a steak that's crusty outside and edge-to-edge perfect inside — plus the one case where a quick pre-sear earns its place.
We earn a commission if you buy through our links. It does not change the price you pay, and it does not decide our picks — the scoring rubric is published in full, including what disqualifies a pick. How this works.
The short answer: sear after
This is the question every new sous vide cook asks, and the answer is unusually clear-cut: sear after the water bath, not before, in almost every case. Sous vide cooks food to a precise, even doneness edge to edge, but it does one thing it cannot do — it does not brown, because browning needs high, dry heat the water bath never provides. So the sear is a separate finishing step, and doing it after the bath is what gives you the ideal result: a fresh, crisp, deeply browned crust wrapped around an interior that is cooked exactly to your target and no further. If you have not run a full cook yet, how to sous vide a steak puts this in context; this guide is about the sear specifically.
Why searing after works so well
The whole magic of sous vide is that the interior is already perfect when it comes out of the bag — a medium-rare steak is medium-rare from edge to edge, with none of the gray band a pan leaves. A quick, ripping-hot sear at the end adds the browned, flavorful crust (the Maillard reaction) without having time to overcook that perfect interior, because you are only hitting the surface for a minute or so. Do it the other way round — sear first, then bath — and you get a crust, yes, but by the time the food has spent an hour or more in the water and comes out, that crust has softened in its own steam and juices inside the bag, so you end up having to sear again at the end anyway. Searing after is simply the version with the better crust and fewer steps.
When a quick pre-sear actually helps
There is one honest exception worth naming, because “always after” is not quite the whole truth. Some cooks do a very brief, hard pre-sear for one specific reason: food safety and flavor on the exterior before a long, low cook. A quick sear of the raw surface can knock back surface bacteria before a lengthy bath (the interior is pasteurized by the time-and-temperature of the cook itself, covered in is sous vide safe), and it can build a little extra fond and flavor. If you do this, keep it brief — a few seconds a side, just to color the surface — and you will still sear again after the bath for the real crust. So the pre-sear is an optional extra, never a replacement for the post-bath sear. For everyday cooking, skip it; sear once, after.
How to get the best crust after the bath
The post-bath sear rewards a few habits. First, dry the surface thoroughly — pat the meat completely dry with paper towels the moment it leaves the bag, because surface moisture steams instead of browning and is the number-one reason a sous vide sear comes out pale. Second, use the highest heat you can: a screaming-hot cast-iron pan, a bit of high-smoke-point oil, or a torch, so the crust forms fast before the heat penetrates and overcooks the edge. Third, keep it short — under a minute per side is usually enough, since you are only browning, not cooking through. And fourth, if you want an extra margin against overcooking the edge, give the bagged food a few minutes to cool slightly before searing, or drop it into an ice bath briefly first (a trick from the frozen and make-ahead workflow). Because the machine did the precise part, all the sear has to do is add color and crunch.
The rule: sear after the bath, almost every time — it gives you a fresh, crisp crust on food that is already cooked edge-to-edge perfect. A brief pre-sear is optional and only ever an addition, never a replacement. For the best post-bath crust: pat the surface bone-dry, use the highest heat you have, and keep the sear under a minute a side so you do not overcook the perfect interior.
The hardware
The cookers this page is about
The cookers referred to above, with prices pulled live from Amazon and dated on every card. Full rankings live in the roundups linked from this page.
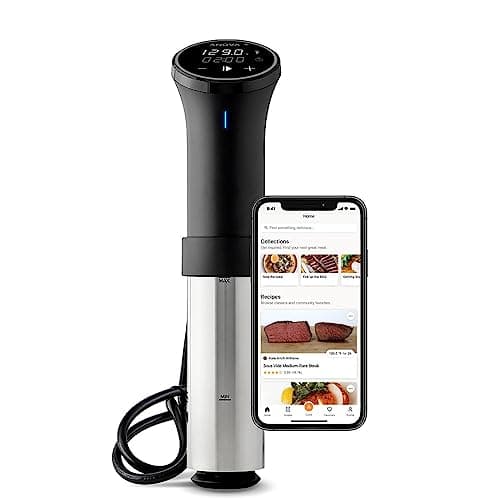
1,100 W
Anova Precision Cooker 3.0 (WiFi), 1100 W
The sous vide circulator most people should buy. Anova publishes the full specification — 1,100 W, a 0–92°C range, ±0.1°C accuracy, an 8 L/min pump — and backs it with a two-year warranty, the longest here. It has an on-device screen so it works without the app, which the Joule does not.
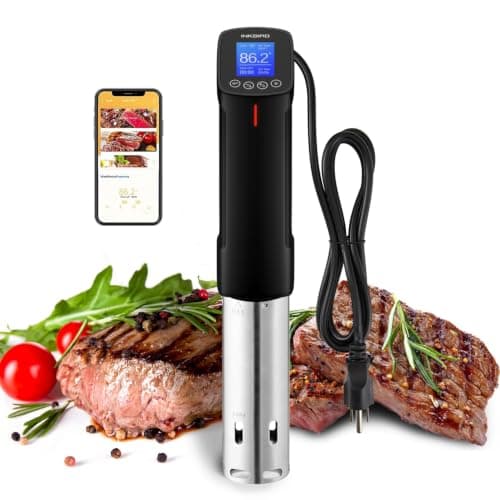
1,000 W
Inkbird ISV-100W WiFi Sous Vide, 1000 W
The value pick that does not feel like one. Under $100, and Inkbird still publishes the full specification: 1,000 W, a 25–99°C range, ±0.1°C accuracy, 15 L capacity, WiFi and an on-device dot-matrix screen. It undercuts the Anova by more than half and gives up remarkably little on paper.
#ad · As an Amazon Associate we earn from qualifying purchases.
Questions
Frequently asked
Should you sear before or after sous vide?
Is there any reason to sear before sous vide?
How do you get a good crust after sous vide?
Keep reading
Related
Receipts
Sources
- USDA FSIS — cooking safely with time and temperature (pasteurization basics)
- Anova Culinary — Precision Cooker 3.0 product page
We have not tested these machines in a lab and we do not pretend to have. Specifications come from the manufacturer's own published documents; electricity rates come from the US Energy Information Administration; prices come from the live Amazon API. Where a figure is not published, the page says “not published” rather than guessing. Read the full method.