HUB 01 · Multicookers
How to Convert a Recipe for a Pressure Cooker
Most recipes are not written for a pressure cooker, but adapting one is mostly a few reliable rules: use less liquid, cut the time dramatically, add dense items in the right order, thicken only after, and never overfill. Here is how to convert a stovetop, oven or slow-cooker recipe without a scorched pot or a mushy result.
We earn a commission if you buy through our links. It does not change the price you pay, and it does not decide our picks — the scoring rubric is published in full, including what disqualifies a pick. How this works.
Why a recipe needs converting at all
A pressure cooker cooks in a sealed, water-saturated environment, which is nothing like an open pot on the stove or a slow cooker with the lid ajar. Almost no moisture escapes, the temperature climbs above a normal boil, and cooking times collapse. So you cannot just pour a stovetop recipe into an Instant Pot and press start — the two biggest things you have to change are the liquid and the time, and getting either wrong is what leads to a watery stew, a mushy vegetable, or the dreaded Burn message. The good news: conversion is mostly a handful of rules that become second nature after a few meals.
Rule 1: reduce the liquid — but keep the minimum
Because a sealed pressure cooker loses almost no moisture, liquid that would boil away on the stove stays in the pot. If you use the full amount a braise or soup calls for, you end up with a thin, watery result. The habit is to reduce added liquid compared with a stovetop or oven braise. The one hard limit is that a pressure cooker needs enough thin liquid to generate steam and reach pressure in the first place — as a rule of thumb, at least about one cup for a standard 6-quart pot. So the target is: enough thin liquid (water, broth, wine, thin sauce) to come to pressure, but not the larger volume a slow, open braise would need. Remember too that meat and vegetables release their own liquid under pressure, which adds to the total.
Rule 2: cut the cooking time dramatically
This is where pressure earns its place, and the reductions are large. Rough rules of thumb by food type: dried beans go from a stovetop hour-plus (or an overnight soak) to well under an hour with no soak; a tough braising cut like chuck or pork shoulder goes from a two-to-three-hour oven braise to roughly a third of that; grains and stews compress similarly. Delicate items — most vegetables, fish, quick-cooking cuts — need only a few minutes, and overshooting turns them to mush. When adapting a specific recipe, find a trusted pressure-cooker time for the same core ingredient and start there rather than guessing a fraction of the original. It is always safer to under-time, check, and return to pressure for a few minutes than to overcook — you cannot un-cook a mushy result.
Rule 3: budget for come-to-pressure and release time
The number you set on the display is not the total time. The cooker first has to come up to pressure — several minutes to fifteen or more, depending on how full and how cold the contents are — and then it has to release, either quickly or naturally. A natural release can add ten to thirty minutes and continues cooking the food gently; a quick release stops it fast. Which one a recipe wants matters as much as the cook time itself — beans and big cuts usually want a natural release, delicate items a quick one — and the full logic is in natural vs quick release. When you convert a recipe, account for all three phases so dinner is not later than you planned.
Rule 4: layer dense items, and thicken only after
Order matters inside the pot. Put thin liquid in first and add dense, scorch-prone items like rice, potatoes or pasta on top rather than buried against the hot base. Most importantly, do not thicken before pressure cooking. Flour, cornstarch, tomato paste, cream and dairy are heavy and sink to the bottom, where they scorch onto the element and trigger the Burn message — or curdle. Add them afterthe pressure cook is done: stir in a slurry and simmer on Sauté to thicken, and stir in dairy at the end. This single habit prevents the most common conversion failure.
Rule 5: never overfill past the max line
A pressure cooker needs headroom for steam, so it has a max fill line you must respect. The standard guidance is to fill no more than two-thirds full for most foods, and no more than half fullfor foods that foam or expand — dried beans, grains, split peas, pasta, anything starchy — because they froth up and can block the steam-release path. If a recipe you are scaling would overfill the pot, split it into two batches rather than crowding it. Overfilling is both a safety issue and a reliability one: a blocked vent is exactly what the machine's safety systems are designed to catch, and it is easily avoided.
The foods that resist conversion
A few recipes simply do not convert well, and it is worth knowing them before you try. Delicate, quick-cooking items— most fish, leafy greens, quick vegetables — cook so fast that pressure is a blunt tool, and the window between done and overdone is a minute or two; these are often better on Sauté or steamed on the rack than pressurized. Recipes built on reduction, where the whole point is simmering a sauce down to concentrate it, fight the sealed environment that keeps moisture in — you reduce afterward on Sauté instead. And dairy-heavy or crisp-finish dishes want their cream, cheese or browning added at the end or under a separate crisping lid, never during the pressure cook. Knowing which recipes are a poor fit saves you from forcing a conversion that was never going to work, and it maps closely onto what a pressure cooker is and is not good at.
A quick conversion checklist
Before you press start on a converted recipe, run the list: (1) reduced the added liquid but kept at least about a cup of thin liquid to reach pressure; (2) set a pressure time based on a trusted time for the same core ingredient, erring short; (3) planned for come-to-pressure and the right release; (4) put thin liquid in first with dense items on top and noflour, dairy or thick sauce stirred into the base — thicken on Sauté afterward; (5) stayed under the max line, half full for beans, grains and anything that foams. An auto-sealing model like the Pro removes one variable — forgetting to close the valve — while you are still learning the rest. Get those five right and almost any braise, soup, stew, bean or grain recipe converts cleanly.
The hardware
The cookers this page is about
The cookers referred to above, with prices pulled live from Amazon and dated on every card. Full rankings live in the roundups linked from this page.
1,000 W
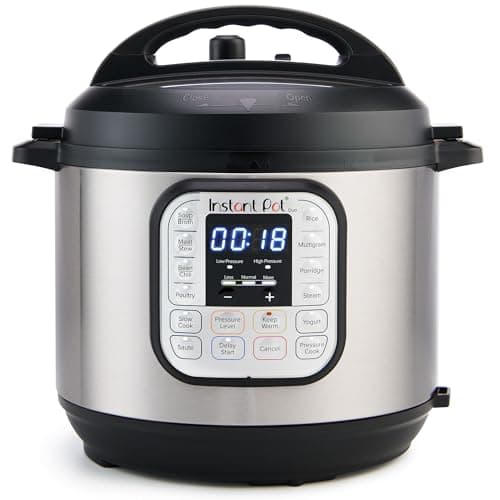
Instant Pot Duo 7-in-1 Electric Pressure Cooker, 6 Quart
The multicooker that made the category, and still the right default. Instant Brands publishes the wattage, the working pressure range and a stainless (not nonstick) inner pot, which is more than most of the field manages — and it costs less than almost all of them.
1,200 W
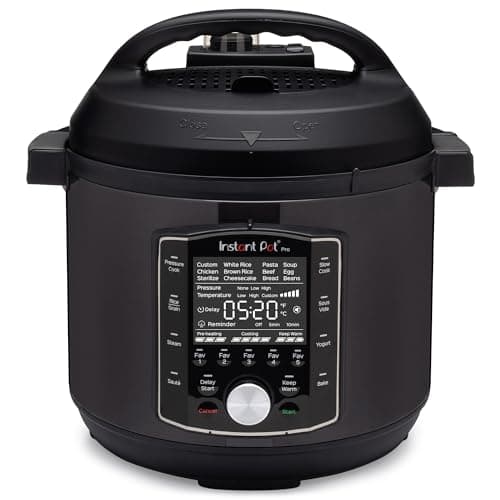
Instant Pot Pro 10-in-1 Pressure Cooker, 6 Quart
The Duo's mechanicals with the interface fixed: a genuine sous vide program, an auto-sealing lid, grab-and-go pot handles and five programmable buttons. It draws 1,200 W rather than the Duo's 1,000, and Instant Brands does not publish a working-pressure figure for it — the one gap in an otherwise well-documented cooker.
#ad · As an Amazon Associate we earn from qualifying purchases.
Questions
Frequently asked
How much do you reduce liquid when converting a recipe for a pressure cooker?
How do I convert cooking times for a pressure cooker?
Why can't you thicken a sauce before pressure cooking?
Keep reading
Related
- Convert slow cooker recipes to an Instant PotThe time, liquid and timing changes.
- How to use a pressure cookerThe core technique conversion builds on.
- What can you cook in an Instant Pot?Which recipes convert well and which don't.
- Multicooker vs slow cookerConverting the other direction, to and from slow cooking.
Receipts
Sources
- Instant Brands — Instant Pot Duo 6qt product page
- Instant Pot IP-DUO60 instruction manual (specification page)
- Instant Brands — Instant Pot Pro 6qt product page
- USDA Food Safety and Inspection Service — safe minimum internal cooking temperatures
We have not tested these machines in a lab and we do not pretend to have. Specifications come from the manufacturer's own published documents; electricity rates come from the US Energy Information Administration; prices come from the live Amazon API. Where a figure is not published, the page says “not published” rather than guessing. Read the full method.